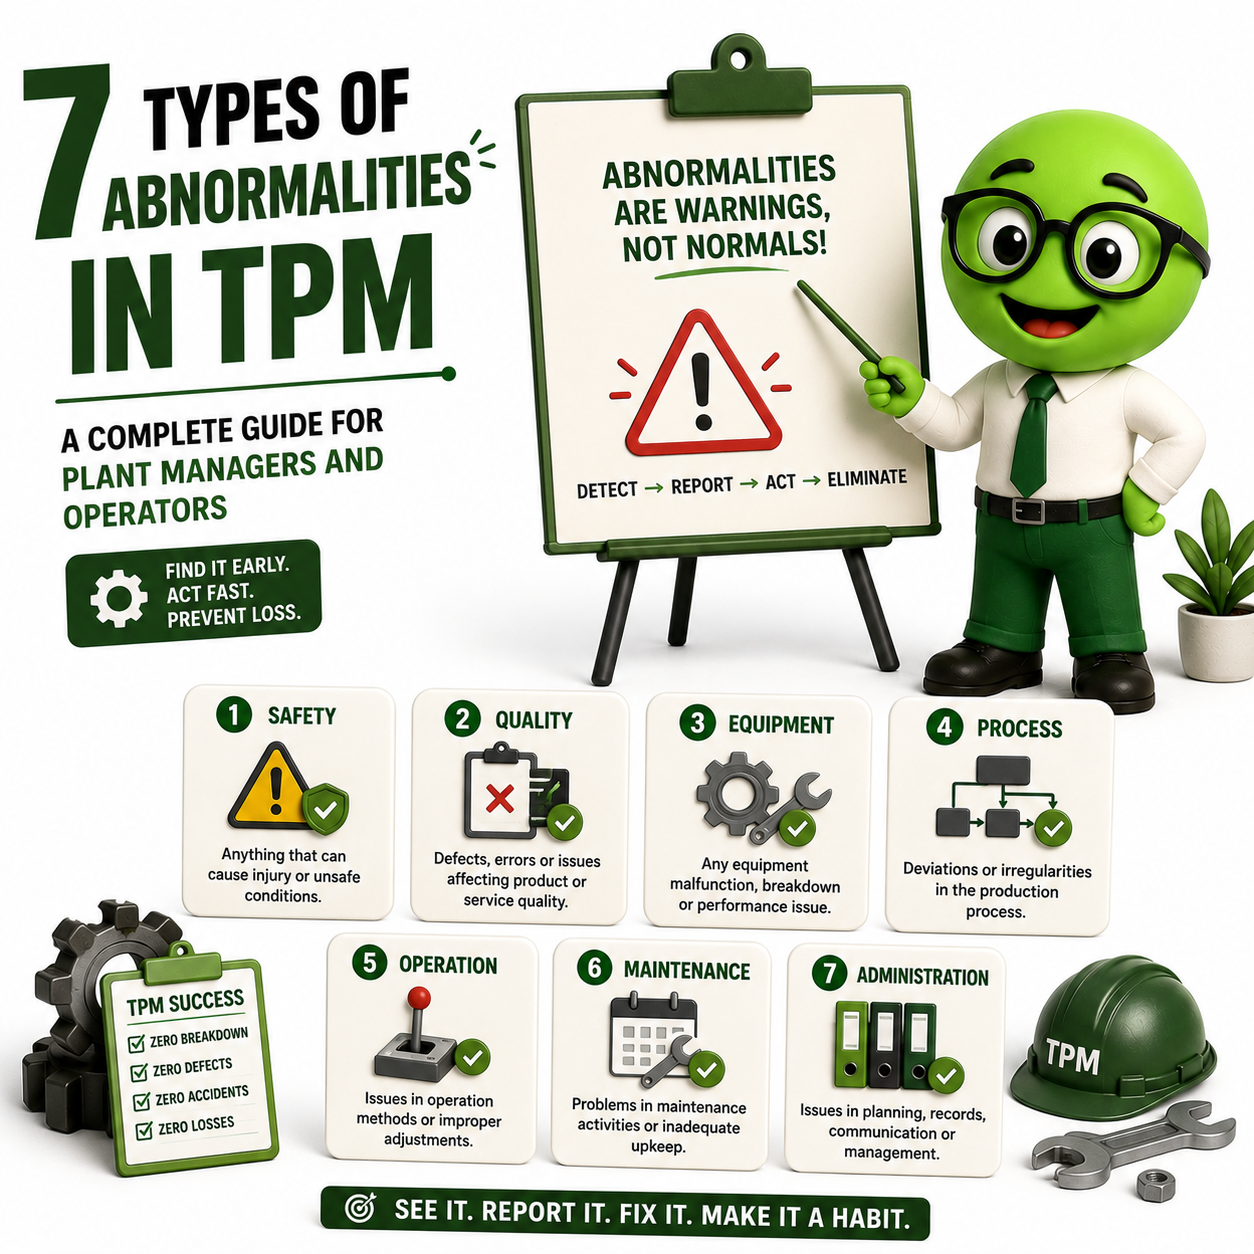

Total Productive Maintenance (TPM) does not fail because of major breakdowns. It fails because small, hidden problems go unnoticed for too long. These problems have a name in TPM: abnormalities.
Understanding and eliminating the 7 types of abnormalities is the foundation of Autonomous Maintenance (Jishu Hozen) — the pillar of TPM that transforms operators from passive machine users into active equipment custodians. When your team cannot identify abnormalities correctly, your TPM programme will stall at Step 1 and never deliver the OEE improvements it promises.
At GreenDot Management Solutions, we have implemented TPM across manufacturing plants in Gujarat, Maharashtra, and Rajasthan — spanning automotive components, pharmaceuticals, textiles, and FMCG. In our experience, plants that invest time in training operators to detect all 7 abnormality types see measurable improvements in equipment availability within the first three months.
This guide will walk you through each abnormality type in detail — what it looks like on the shop floor, how to detect it, what causes it, and what to do about it.
What Is an Abnormality in TPM?
In TPM, an abnormality is any condition in a machine, process, or work area that deviates from the ideal state — but has not yet caused a breakdown or stoppage.
This is an important distinction:
| Breakdown | Abnormality | |
|---|---|---|
| When it appears | After failure occurs | Before failure occurs |
| Production impact | Immediate stoppage | Gradual degradation |
| Who typically detects it | Maintenance team | Trained operator |
| Cost to fix | High (emergency repair) | Low (early intervention) |
| TPM goal | Reduce frequency | Eliminate entirely |
The goal of abnormality identification is zero-breakdown maintenance — catching deterioration before it becomes a failure. In world-class TPM plants, operators tag and resolve abnormalities daily. In plants without TPM training, the same conditions silently erode OEE for months.
How Are Abnormalities Tagged on the Shop Floor?
Before discussing the 7 types, it is important to understand the Red Tag / Blue Tag system — the practical tool used to flag abnormalities during TPM inspections.
- Red Tag: Placed by the operator on an abnormality they have identified but cannot fix themselves. Requires maintenance team intervention.
- Blue Tag: Placed by the operator on an abnormality they can fix themselves with basic training and tools.
Tags are recorded in an Abnormality Register, which tracks open tags, responsible persons, and closure dates. In Indian plants running multiple shifts, the abnormality register also serves as a shift-handover communication tool — ensuring that an abnormality spotted in the morning shift is not missed by the night shift team.
How Do TPM Abnormalities Connect to OEE?
Every unresolved abnormality eventually becomes one of the 6 Big Losses that reduce Overall Equipment Effectiveness (OEE):
| Big Loss Category | OEE Component | Common Abnormality Source |
|---|---|---|
| Breakdown losses | Availability | Minor flaws, unfulfilled basic conditions |
| Setup & adjustment losses | Availability | Unnecessary items, inaccessible places |
| Minor stoppage losses | Performance | Sources of contamination |
| Reduced speed losses | Performance | Unfulfilled basic conditions |
| Quality defects & rework | Quality | Sources of quality defects |
| Startup losses | Quality | Sources of contamination, safety hazards |
World-class OEE is considered 85% or above. Most Indian manufacturing SMEs operate between 40–65% OEE before structured TPM implementation. A significant portion of this gap is directly traceable to unresolved abnormalities.
The 7 Types of Abnormalities in TPM
The 7-type classification originates from the Japan Institute of Plant Maintenance (JIPM) and forms the backbone of Autonomous Maintenance training globally. Here is a master reference table before we explore each type in detail:
| # | Abnormality Type | Simple Definition | Primary Risk | Urgency Level |
|---|---|---|---|---|
| 1 | Minor Flaws | Physical damage or imperfection in equipment | Breakdown | Scheduled |
| 2 | Unfulfilled Basic Conditions | Required operating standards not maintained | Accelerated deterioration | Immediate |
| 3 | Inaccessible Places | Areas that cannot be cleaned, inspected, or lubricated easily | Missed maintenance | Planned redesign |
| 4 | Sources of Contamination | Origins of dust, dirt, oil, or debris | Quality defects, equipment damage | Immediate |
| 5 | Sources of Quality Defects | Conditions that cause products to fail quality standards | Customer complaints, scrap | Immediate |
| 6 | Unnecessary Items | Tools, materials, or equipment not needed in the work area | Safety risk, inefficiency | Immediate |
| 7 | Safety Hazards | Conditions that risk injury to people or damage to the environment | Accidents, legal liability | Critical — stop work |
1. Minor Flaws
What Are Minor Flaws?
Minor flaws are small physical defects or imperfections in equipment that do not immediately stop production but create conditions for future failure. They are the most common abnormality type and, if left unaddressed, almost always develop into breakdowns.
The JIPM classifies minor flaws into these sub-categories:
- Contamination — oil stains, dust accumulation, rust, product deposits
- Damage — cracks, scratches, dents, chips, deformation
- Play and looseness — worn threads, slack in fasteners, vibrating guards
- Abnormal phenomena — unusual heat, noise, vibration, smell
- Corrosion — rust on structural or moving parts
- Non-compliance — parts installed incorrectly or out of specification
What Does It Look Like on the Shop Floor?
A hairline crack on a machine base plate. A bolt that vibrates loose every few days. A bearing that hums slightly at startup. A gear guard with a dent that no longer fits flush.
None of these stop production today. All of them will cause a problem in the future.
How to Detect Minor Flaws
- Visual inspection during daily autonomous maintenance checks
- Touch inspection — running a gloved hand along surfaces to feel for cracks, looseness, or heat
- Listen inspection — noting unusual sounds during startup or steady-state operation
- Smell inspection — catching burning insulation, overheated oil, or chemical leaks early
Corrective Action
- Tag with a Red or Blue tag depending on who can fix it
- Record in the Abnormality Register with date, location, and description
- Restore to standard — tighten, replace, seal, or clean as appropriate
- Update the One Point Lesson (OPL) so other operators know the standard
GreenDot Insight: In a Surat-based textile machinery plant, we found that 70% of their unplanned stoppages were traceable to minor flaws — specifically loose fasteners and accumulated fibre contamination on drive units — that had been visible for weeks but never tagged because operators had not been trained to see them as problems.
2. Unfulfilled Basic Conditions
What Are Unfulfilled Basic Conditions?
These are situations where the three basic requirements of equipment health — cleaning, lubrication, and retightening (CIL: Clean, Inspect, Lubricate) — are not being met consistently.
Basic conditions are called “basic” because without them, all other maintenance activities lose their effectiveness. A machine that is not properly lubricated will deteriorate faster than any inspection schedule can compensate for.
Sub-Types of Unfulfilled Basic Conditions
| Basic Condition | When Unfulfilled | Consequence |
|---|---|---|
| Cleaning | Dirt and chips accumulate | Abrasion, overheating, quality defects |
| Lubrication | Oil or grease not applied or degraded | Friction, wear, seizure |
| Retightening | Fasteners allowed to loosen | Vibration damage, misalignment, injury |
What Does It Look Like on the Shop Floor?
A lubrication point that has not been greased because the grease nipple is buried under a cover. A bolt torque that has never been standardised, so operators tighten “by feel.” A machine that is never cleaned because the cleaning procedure takes 40 minutes and no time has been allocated.
How to Detect Unfulfilled Basic Conditions
- Review the lubrication schedule and check physical evidence (oil levels, grease condition)
- Inspect all fasteners with a torque wrench against defined standards
- Check CIL (Clean-Inspect-Lubricate) activity records for gaps or skipped dates
Corrective Action
- Establish written CIL standards for every machine — specifying type, quantity, location, and frequency
- Create visual standards (photos of correct vs. incorrect condition) posted at the machine
- Incorporate CIL into the daily operator checklist
- Train operators on why each condition matters, not just what to do
GreenDot Insight: In most Indian SME plants we assess, lubrication is the most frequently unfulfilled basic condition — not because operators are careless, but because lubrication points are inaccessible, the correct lubricant type is not labelled, and no standard frequency has ever been documented. This is a management system failure, not an operator failure.
3. Inaccessible Places
What Are Inaccessible Places?
These are areas of equipment that cannot easily be cleaned, inspected, or lubricated — because of how the machine is designed, installed, or positioned. Inaccessible places are dangerous because they guarantee that abnormalities in those areas will be missed.
Common Examples in Indian Manufacturing
- Coolant lines running behind panel boards in CNC machines
- Bearing housings on textile looms that require partial disassembly to inspect
- Underside of conveyor frames in food and pharma plants — unreachable without a mirror or endoscope
- Electrical panels placed so close to walls that rear wiring cannot be inspected
- Pump seals located inside process vessels in chemical plants
How to Detect Inaccessible Places
During TPM Step 1 (Initial Cleaning), operators physically clean every part of the machine. Any area they cannot reach is flagged as an inaccessible place.
Corrective Action
Inaccessible places require kaizen (improvement activity) — they cannot be solved by effort alone:
- Re-route — move pipes, cables, or guards to create access
- Install inspection windows — transparent covers, sight glasses, or endoscope ports
- Redesign covers — replace bolted covers with quick-release versions
- Use tools — extend-reach brushes, inspection mirrors, borescopes for areas that cannot be physically modified
Note for Indian SMEs: Many inaccessible places result from machines being installed without considering maintenance access — a common issue when equipment is sourced second-hand or imported without installation guidance. Addressing these through low-cost kaizen is always more effective than accepting the inaccessibility as permanent.
4. Sources of Contamination
What Are Sources of Contamination?
A source of contamination is the origin point of any foreign material — dust, chips, coolant, oil, moisture, product — that enters equipment or the work area and causes deterioration or quality problems.
The critical insight here is the word source. TPM does not just clean up contamination — it identifies and eliminates where contamination comes from.
Types of Contamination Sources
| Source Type | Example | Common Industry |
|---|---|---|
| Generated internally | Metal chips from cutting process landing on slideways | Automotive components |
| Leaked internally | Hydraulic oil escaping from worn seals | General engineering |
| Entering from outside | Dust ingress into electrical panels in open workshops | Textiles, ceramics |
| Product contamination | Powder escaping from mixer seals | Pharma, food |
| Process fluid splashing | Coolant spraying onto machine exteriors | Machining |
How to Detect Sources of Contamination
- Place white paper or cloth under suspected leak points overnight — staining reveals the source
- Trace contamination upstream: if a slideway is dirty, follow the chip trail back to its generation point
- Map contamination sources on a machine sketch — this becomes a kaizen priority list
Corrective Action
- Eliminate the source if possible (re-route process, seal gaps, improve guarding)
- Contain contamination if elimination is not immediately possible (add splash guards, drip trays)
- Clean on a standardised schedule until the source is eliminated
- Monitor effectiveness after kaizen
GreenDot Insight: Contamination from one machine to another — particularly oil mist and fine powder — is extremely common in Indian factories where machines are installed close together to save floor space. We call this “neighbourhood contamination” and it requires a workspace-level kaizen, not just machine-level fixes.
5. Sources of Quality Defects
What Are Sources of Quality Defects?
These are equipment or process conditions that directly cause products to fail quality standards. Unlike a breakdown — which stops production — a source of quality defects is more dangerous because it allows production to continue while producing bad output.
The Hidden Cost
Every quality defect has three costs that most plants underestimate:
- The cost of the defective material itself (scrap or rework)
- The cost of the production time wasted on a defective product
- The cost of detecting the defect after it reaches the next process or the customer
In plants without TPM, sources of quality defects accumulate silently. In pharma and food manufacturing, they also carry regulatory risk.
Common Examples
- A worn punch and die producing parts with burrs or out-of-tolerance dimensions
- A packaging machine with a worn sealing jaw producing inconsistent seals
- A conveyor with an uneven belt causing misaligned product positioning
- A mixing paddle with worn blades producing inconsistent blending in a pharma plant
- Temperature controllers drifting out of calibration in a food processing unit
How to Detect Sources of Quality Defects
- Correlate quality rejection data with specific machines, shifts, or time periods
- Inspect tooling dimensions against drawings — worn tools are the most common source
- Check process parameters (temperature, pressure, speed) against defined standards
- Review rework records — repeated rework of the same type indicates a source, not a random event
Corrective Action
- Immediately contain the defect — halt production on the affected line if the risk is high
- Identify and tag the root cause (worn tool, drifting parameter, damaged fixture)
- Replace or restore the equipment/tooling to standard
- Set a monitoring frequency for that parameter going forward
- Consider poka-yoke (mistake-proofing) to prevent recurrence
6. Unnecessary Items
What Are Unnecessary Items?
Unnecessary items are materials, tools, equipment, fixtures, or documents that are present in the work area but are not needed for current production. They create clutter, hide abnormalities, cause safety risks, and reduce the efficiency of every task performed in that space.
Connection to 5S
This abnormality type directly corresponds to the first S in 5S — Seiri (Sort). If your organisation has implemented 5S, you have already begun addressing unnecessary items. TPM extends this by looking specifically at unnecessary items on and around equipment — not just the general work area.
| Unnecessary Items in 5S | Unnecessary Items in TPM |
|---|---|
| Old documents, excess inventory, unused furniture | Spare parts left on machine tops, old tooling in machine drawers |
| Focused on the work area generally | Focused on equipment specifically |
| Sort → Set in order → Shine | Sort → Identify abnormalities → Restore to standard |
What Does It Look Like on the Shop Floor?
Spare punches stored on top of a press that should be in the tool room. Oil cans of three different lubricants next to a machine that only needs one. A broken jig placed beside the machine “temporarily” — three months ago. Rags stuffed into gaps in machine covers.
Each of these seems minor. Together, they create an environment where real abnormalities cannot be seen, and where the daily question is not “is this machine in good condition?” but “which of these things is a problem?”
Corrective Action
- Apply Red Tag kaizen — tag every item in the area that cannot be confirmed as necessary
- Evaluate each tagged item: return to storage, relocate, dispose, or confirm as needed
- Establish a standard for what should be present at each machine and in what quantity
- Maintain through daily 5S and TPM audit rounds
7. Safety Hazards
What Are Safety Hazards?
Safety hazards are conditions in equipment, processes, or the work environment that create risk of injury to personnel, damage to property, or harm to the environment. In TPM, safety is not a separate department function — it is an operator responsibility, addressed daily during autonomous maintenance activities.
This is the only abnormality type where the response is never “schedule it” — it is always stop, tag, and escalate immediately.
Common Safety Hazards in Indian Manufacturing Plants
- Exposed rotating parts (belts, pulleys, gears) with missing or damaged guards
- Electrical panels with open doors, missing knockouts, or damaged insulation
- Coolant or oil on walkways creating slip hazards
- Pressure vessels or pneumatic lines without pressure relief visible
- Fire extinguishers blocked by equipment or materials
- Inadequate lighting in machine inspection areas
- Chemical storage near heat sources or without proper segregation
- Overhead equipment (cranes, hoists) with worn chains or limit switches not functioning
Regulatory Context for Indian Plants
Under the Factories Act, 1948 and its associated State Rules, Indian factory occupiers and managers are legally responsible for safe plant and machinery. Specific obligations include:
- Fencing of dangerous machinery (Section 21)
- Safe means of access and safe place of employment (Section 32–33)
- Maintenance of electrical systems (Indian Electricity Rules)
TPM’s safety abnormality identification process, when documented with tag records and closure dates, also provides an audit trail that demonstrates due diligence to factory inspectors.
How to Detect Safety Hazards
- Include a safety checklist in daily operator inspection rounds
- Conduct monthly safety abnormality audits with cross-functional teams
- Train all operators to immediately stop and report any safety abnormality — without fear of reprimand
- Review near-miss reports as leading indicators of undetected safety abnormalities
Corrective Action
- Stop work on the affected machine or area immediately if the risk is immediate
- Place a Red Tag and inform the supervisor and safety officer in the same shift
- Do not restart the machine until the hazard is corrected and verified
- Document the hazard, correction, and verification in the Abnormality Register
- Conduct a brief team review — if one machine had this hazard, others may too
Abnormality Detection: Who Is Responsible?
One of the most important cultural shifts in TPM is the transfer of abnormality detection from the maintenance team to the operator. This is not about reducing the maintenance team — it is about creating more eyes on every machine, every day.
| Abnormality Type | Primary Detector | Backup Detector |
|---|---|---|
| Minor Flaws | Operator | Maintenance technician |
| Unfulfilled Basic Conditions | Operator | Maintenance technician |
| Inaccessible Places | Operator (during cleaning) | TPM coordinator |
| Sources of Contamination | Operator | Quality engineer |
| Sources of Quality Defects | Operator / Quality inspector | Process engineer |
| Unnecessary Items | Operator | 5S auditor |
| Safety Hazards | Any person on the shop floor | Safety officer |
The rule is simple: anyone who sees an abnormality is responsible for tagging it. Waiting for “the maintenance person” to report what you have already seen is a cultural failure that TPM directly addresses.
Training Operators to Identify Abnormalities: The One Point Lesson (OPL)
One of the most effective tools for building abnormality identification skill is the One Point Lesson (OPL) — a single-page visual document that teaches one specific skill or standard.
For each of the 7 abnormality types, GreenDot recommends creating OPLs that cover:
- What the normal condition looks like (photo)
- What the abnormal condition looks like (photo)
- How to detect it
- What to do when found
OPLs are posted at the machine, reviewed in brief team meetings, and updated as new abnormalities are discovered. They transform individual learning into team knowledge — and they are one of the most cost-effective TPM tools available to Indian SMEs.
Frequently Asked Questions
Q: What is the difference between a breakdown and an abnormality in TPM? A: A breakdown is a failure that has already occurred and stopped production. An abnormality is a deteriorating condition that has not yet caused a failure. TPM focuses on finding and eliminating abnormalities before they become breakdowns. This is the shift from reactive to proactive maintenance.
Q: Who invented the 7 types of abnormalities in TPM? A: The framework originates from the Japan Institute of Plant Maintenance (JIPM), which developed and standardised TPM as a methodology in the 1970s. The 7 types form the basis of Autonomous Maintenance (Jishu Hozen) training globally.
Q: How many types of abnormalities are there in TPM? A: The standard JIPM framework defines 7 types. Some organisations group or sub-divide them differently depending on their industry, but the 7-type classification is the most widely used and recognised framework.
Q: Which abnormality type is most common in Indian manufacturing plants? A: In our consulting experience across Gujarat and Maharashtra, unfulfilled basic conditions — particularly inadequate lubrication and inconsistent fastener retightening — is the most frequently encountered abnormality type. This is often followed by sources of contamination, particularly in machining, textile, and food processing environments.
Q: How do TPM abnormalities affect OEE? A: Every unresolved abnormality eventually contributes to one of the 6 Big Losses. Minor flaws and unfulfilled basic conditions typically reduce Availability through breakdowns. Sources of contamination and quality defects reduce the Quality rate. Inaccessible places and unnecessary items increase setup and adjustment time, reducing Availability and Performance. Systematically eliminating abnormalities is one of the most direct routes to improving OEE.
Q: Can abnormalities be fully eliminated? A: In theory, the TPM goal is zero abnormalities — a state called the “ideal condition” of equipment. In practice, new abnormalities always appear as machines age and processes change. The goal is not a fixed endpoint but a continuous cycle of detect → correct → prevent → detect again. World-class TPM plants aim to reduce the time between detection and correction to less than 24 hours for all non-critical abnormalities.
Q: What is the Red Tag system in TPM? A: The Red Tag system is a visual management tool used during TPM inspections. When an operator finds an abnormality they cannot fix themselves, they attach a physical red tag to the affected part of the machine. The tag contains the date, description of the abnormality, and the operator’s name. All open red tags are tracked in an Abnormality Register until they are resolved. Blue tags are used for abnormalities the operator can fix themselves.
Q: How is TPM abnormality identification different from a safety audit? A: A safety audit is typically a periodic, formal review conducted by safety officers or an external team. TPM abnormality identification — specifically for safety hazards — is a daily activity performed by operators as part of their autonomous maintenance routine. TPM aims to catch safety hazards continuously, not just during scheduled audits.